Semi-permanent nail polish is an excellent way to create a trendy and unique manicure. As opposed to traditional manicures, the semi-permanent option only needs to be applied once, providing it with a longer lifespan while staying durable and fashionable. In this article, we explore the basics of semi-permanent nail polish and some easy ways to spruce up your next mani.
What Prerequisites Do You Need?
Before you can create a semi-permanent nail art design, you will need to gather a few supplies. You will need a base coat, top coat, and color polish of your choice. You will also need a small brush or dotting tool for the nail art design.
If you are using acrylic paint for your design, you will also need a thin paintbrush. Finally, you will need a top coat sealer to protect your design.
How to Create Gorgeous Nail Art Designs with Semi-Permanent Nail Polish?
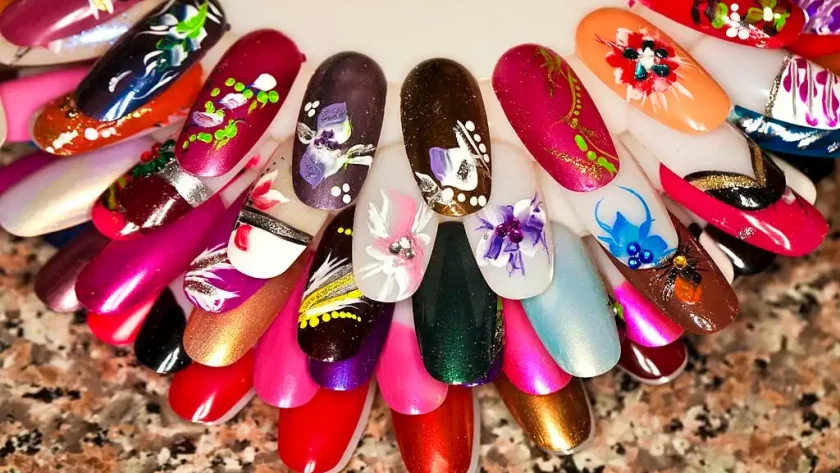
Whether you’re a beginner or a seasoned pro, these semi-permanent nail art designs are sure to impress. Using just a few simple techniques, you can create a wide variety of looks that are perfect for any occasion. One of the great things about semi-permanent nail polish is that it’s very easy to work with.
You can create intricate designs without having to worry about making mistakes. And if you do make a mistake, it’s easy to fix – simply remove the offending polish and start again.
Here are some tips to get you started:
#Step 1: Apply Base Coat
Begin by applying a base coat of semi-permanent nail polish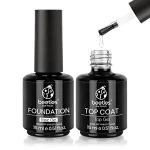 to your nails. This will help the color adhere better and will also make your nails look more even. Buy this Top Coat and Base Coat Set.
#Setp 2: Apply Your Color
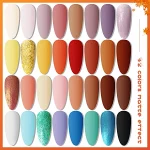
Once the base coat is dry, apply your desired color in thin strokes. Work from the outside in, so that any mistakes will be less noticeable. Buy this Collection of 35 Nail Colors.
#Step 3: Use Nail Art Design Tools
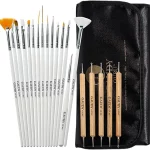
To create different designs, try using a toothpick or other sharp object to make dots, lines, or other shapes on your nails. Buy 20pc Professional Nail Art Design Tool Kit Set.
#Step 4: Apply Top Coat
When you’re finished, seal your design with a top coat of nail polish. This will help protect your design and make it last longer. Buy this Top Coat and Base Coat Set.
#Step 5: Let Your Nails Dry
 Once you have applied your semi-permanent nail polish, it is important to let your nails dry completely before using a UV LED nail dryer. If you do not let your nails dry completely, the polish will not last as long and may even chip or peel off. Buy Professional UV LED Nail Dryer Lamp with 3 Timer Setting.
With these simple tips, you’ll be creating beautiful semi-permanent nail art designs in no time!
DIY Manicure Tips for Long-Lasting Semi-Permanent Nail Polish
Achieving a long-lasting semi-permanent manicure at home is easier than you might think! Follow these simple tips for a salon-quality mani that will last for weeks:
- Start with clean, dry nails. Be sure to remove any old polish or residue with acetone-free nail polish remover.
- If your nails are overly oily, buff them lightly with a nail file to create a smooth surface for polish adhesion.
- Apply a base coat of nail polish. This will help your color polish adhere better and prevent staining of your nails.
- Apply 2-3 coats of colored nail polish, allowing each coat to dry completely in between applications.
- Finish with a clear nail polish top coat for extra durability and shine.
Regular Vs Semi-Permanent Nail Polish: Which is Right for You?
When it comes to choosing nail polish, there are two main types: regular and semi-permanent. Both have their own unique benefits that can make them a good choice for your nails. Here is a comparison of the two types of nail polish to help you decide which is right for you.
| Regular Nail Polish | Semi-Permanent Nail Polish |
|---|---|
| It is the most common type of nail polish. | This is a newer type of nail polish that has become very popular in recent years. |
| It is easy to apply and can be found in a wide variety of colors and finishes. | It is applied like regular nail polish, but it uses a different type of formula that makes it last longer. |
| Regular nail polish also dries relatively quickly, so you don’t have to wait long before your nails are ready to go. | Semi-permanent nail polish won’t dry quickly as regular nail polish, so you’ll get more time to decorate your nails. |
| The main downside is that it does not last as long as semi-permanent nail polish. | The downside to semi-permanent nail polish is that it can be more difficult to remove than regular nail polish. |
| It can start to chip within a few days, so you will need to touch up your nails more often. | It can last for weeks without chipping or fading, so you don’t have to worry about touch-ups as often. |
Conclusion,
Now that you know all about semi-permanent nail polish, give it a try! You may be surprised at how much you like it. Remember to follow the tips in this article for the best results. And don’t forget to have fun with your nails!